Inviting Your Team
Add team members to your Iden organization and assign them roles.
This guide shows you how to add your IT, security, and operations colleagues to Iden and give them the right level of access. Each person gets a role that determines exactly what they can see and do in the dashboard.
Only Super Admin users can add team members and manage roles.
Step 1: Open Team settings
In the left sidebar, go to Settings, then scroll to the Team section. You will see a table listing all current team members and their roles.
The screen below shows what you will see:
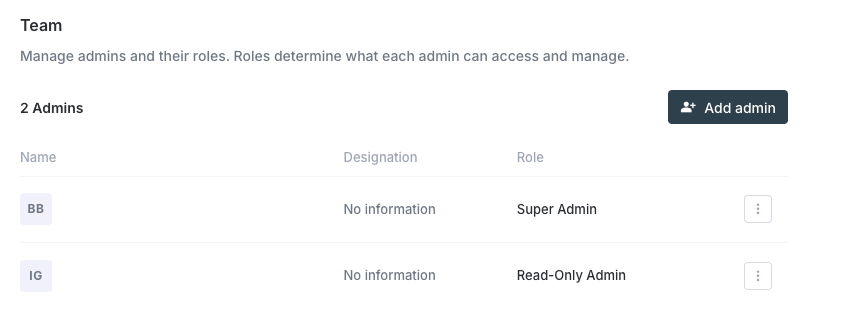
Step 2: Add a new admin
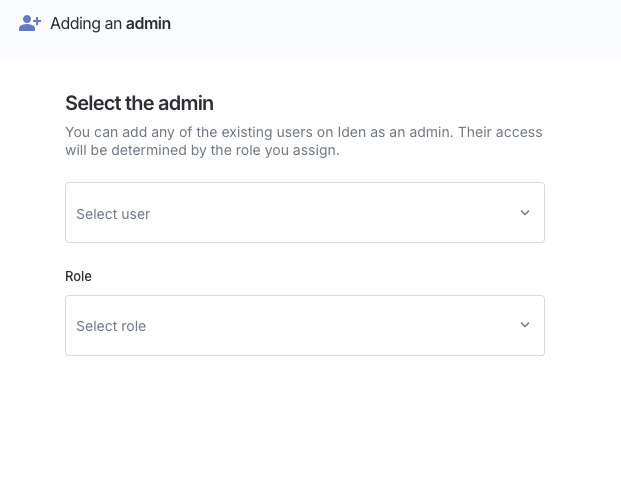
Click Add Admin in the top right corner of the Team table. A panel will slide open on the right side of the screen.
The person you are adding must already exist as a user in Iden. This means they need to have logged in at least once, or been added through the employee onboarding process.
Step 3: Select the user
Under Select the member, click the search box and type the person's name or email address. Select them from the results.
Their profile card (showing their name, email, and photo) will appear to confirm your selection.
Step 4: Assign a role
Under Role, choose the appropriate role from the dropdown list. See the roles table below to understand what each role allows.
Once you have selected both a user and a role, click Add admin. Their new permissions will take effect the next time they sign in to Iden.
Your screen should look like this:
Iden will send a dashboard invitation email to the user as soon as their role is assigned.
Roles reference
Use this table to decide which role to assign. Give each person only the level of access they need.
| Role | What they can do |
|---|---|
| Super Admin | Full access - manage apps, users, settings, team members, access reviews, and billing |
| Read-Only Admin | View everything in the dashboard but cannot make any changes |
| Users Reader | View users and identities only |
| Users Read/Write | View and edit users and identities |
| Ticket Auditor | View access request tickets and approval history |
| Workspaces Admin | Manage sub-tenants (separate workspaces within your organization) and workspace-level settings |
| Workspaces Manager | Manage workspace membership and configuration |
Workspaces Admin and Workspaces Manager are only visible if your organization uses the multi-workspace feature (where your Iden account is divided into separate sub-areas for different teams or business units).
Changing an admin's role
In the Team table, click the ... menu on a member's row and select Edit role. The same panel opens with their current role already selected. Update it and click Update role.
Removing an admin
In the ... menu, click Remove admin. This immediately removes their access to the Iden dashboard. Their user record in Iden is not deleted - only their admin access is removed.
How regular employees access Iden
Regular employees who are not admins do not need an explicit invitation. Once they are added through the onboarding process, they automatically get access to the Iden employee portal. This is a simple self-service area where they can see their own app access and submit access requests. Only the admin dashboard requires a role assignment.