Employee Onboarding
How to onboard new employees in Iden - manually or via CSV import.
This guide walks you through how to add new employees to Iden, assign them the right apps, and schedule when their access is set up. You can add one person at a time or import many new hires at once.
You need the Super Admin or Users Read/Write role to onboard employees.
Starting onboarding
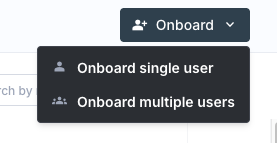
From the left sidebar, go to Users. Click the Onboard dropdown at the top right and choose:
- Onboard single user - opens a form for one new hire
- Onboard multiple users - opens the bulk onboarding table
Your screen should look like this:
Step 1: Choose your input method
| Option | Best for |
|---|---|
| Manually enter user details | One or a few new hires |
| Import user details from CSV | Adding many new hires at once using a pre-filled spreadsheet |
Click Proceed to onboard to continue.
Step 2: Enter user details
Manual entry
An empty row appears in the table. Fill in the fields for each user:
| Field | Required | Notes |
|---|---|---|
| First name | Yes | |
| Last name | Yes | |
| Is employee | Yes | Turn on for full-time employees. Turn off for contractors. |
| Personal email | Yes | Used to send the welcome email before their work email is ready |
| Work email | Yes | Iden suggests one automatically based on your organization's domain |
| Manager email | No | Iden fills this in as you type, from your existing Iden users |
| Onboarding date | No | When access is set up - defaults to as soon as possible |
| Onboarding template | Yes | Determines which apps are set up for this person |
Click Add Row to add more users. Iden checks each field as you type and shows errors immediately in the table.
The screen below shows what you will see:

CSV import
A CSV file is a plain spreadsheet that works with tools like Excel or Google Sheets.
- Click Download Onboarding Template.csv to get the template file.
- Open the file and fill in your new hires' details.
- Drag the completed file into Iden, or click to browse for it. The maximum file size is 5 MB.
- Iden loads the rows into the table. Review and make any changes before moving on.
Step 3: Set the onboarding date
You can set one date that applies to everyone, or set a different date for each person in the table.
| Option | When access is set up |
|---|---|
| ASAP | Right away, as soon as you confirm |
| End of day | At midnight on today's date |
| Custom | Choose a specific date and time |
Step 4: Confirm
Once all rows are valid, click Onboard [N] users. A confirmation prompt appears - click Yes, onboard N users to finish.
The new employees appear on the Users page with an Onboarding status while their apps are being set up in the background.
Onboarding templates
Templates define which apps a new hire gets access to. Without a template, Iden does not know which apps to set up.
Go to Settings - Access Templates (Super Admin only) to create or edit templates.
Example: A "Frontend Engineer" template that sets up GitHub, Figma, Slack, and Notion. Selecting this template during onboarding sets up all four apps automatically.
If no templates exist yet, Iden will ask you to create one first. Go to Settings - Access Templates to get started.
Validation errors
If something is wrong with a row, Iden shows a red icon on the left side of that row. Fix all errors before confirming.
| Error | Cause |
|---|---|
| "Required field, please fill this field" | A required column is empty |
| "Rows X, Y have the same email" | Two rows share a personal or work email address |
| Invalid email format | An email field does not match the expected format |