Grant Access Flow
How admins can directly provision access for a user without going through the ticket flow.
This page explains how admins can give a user access to an app directly, without waiting for the normal ticket and approval process.
As an admin, you can grant access immediately. This is useful when you are onboarding (setting up) a new employee, restoring access after a role change, or handling an urgent request that cannot wait.
You need the Super Admin role or the Users Read/Write role to grant access directly. If you are unsure which role you have, ask your Iden administrator.
Starting the grant access flow
There are two ways to open the grant access flow:
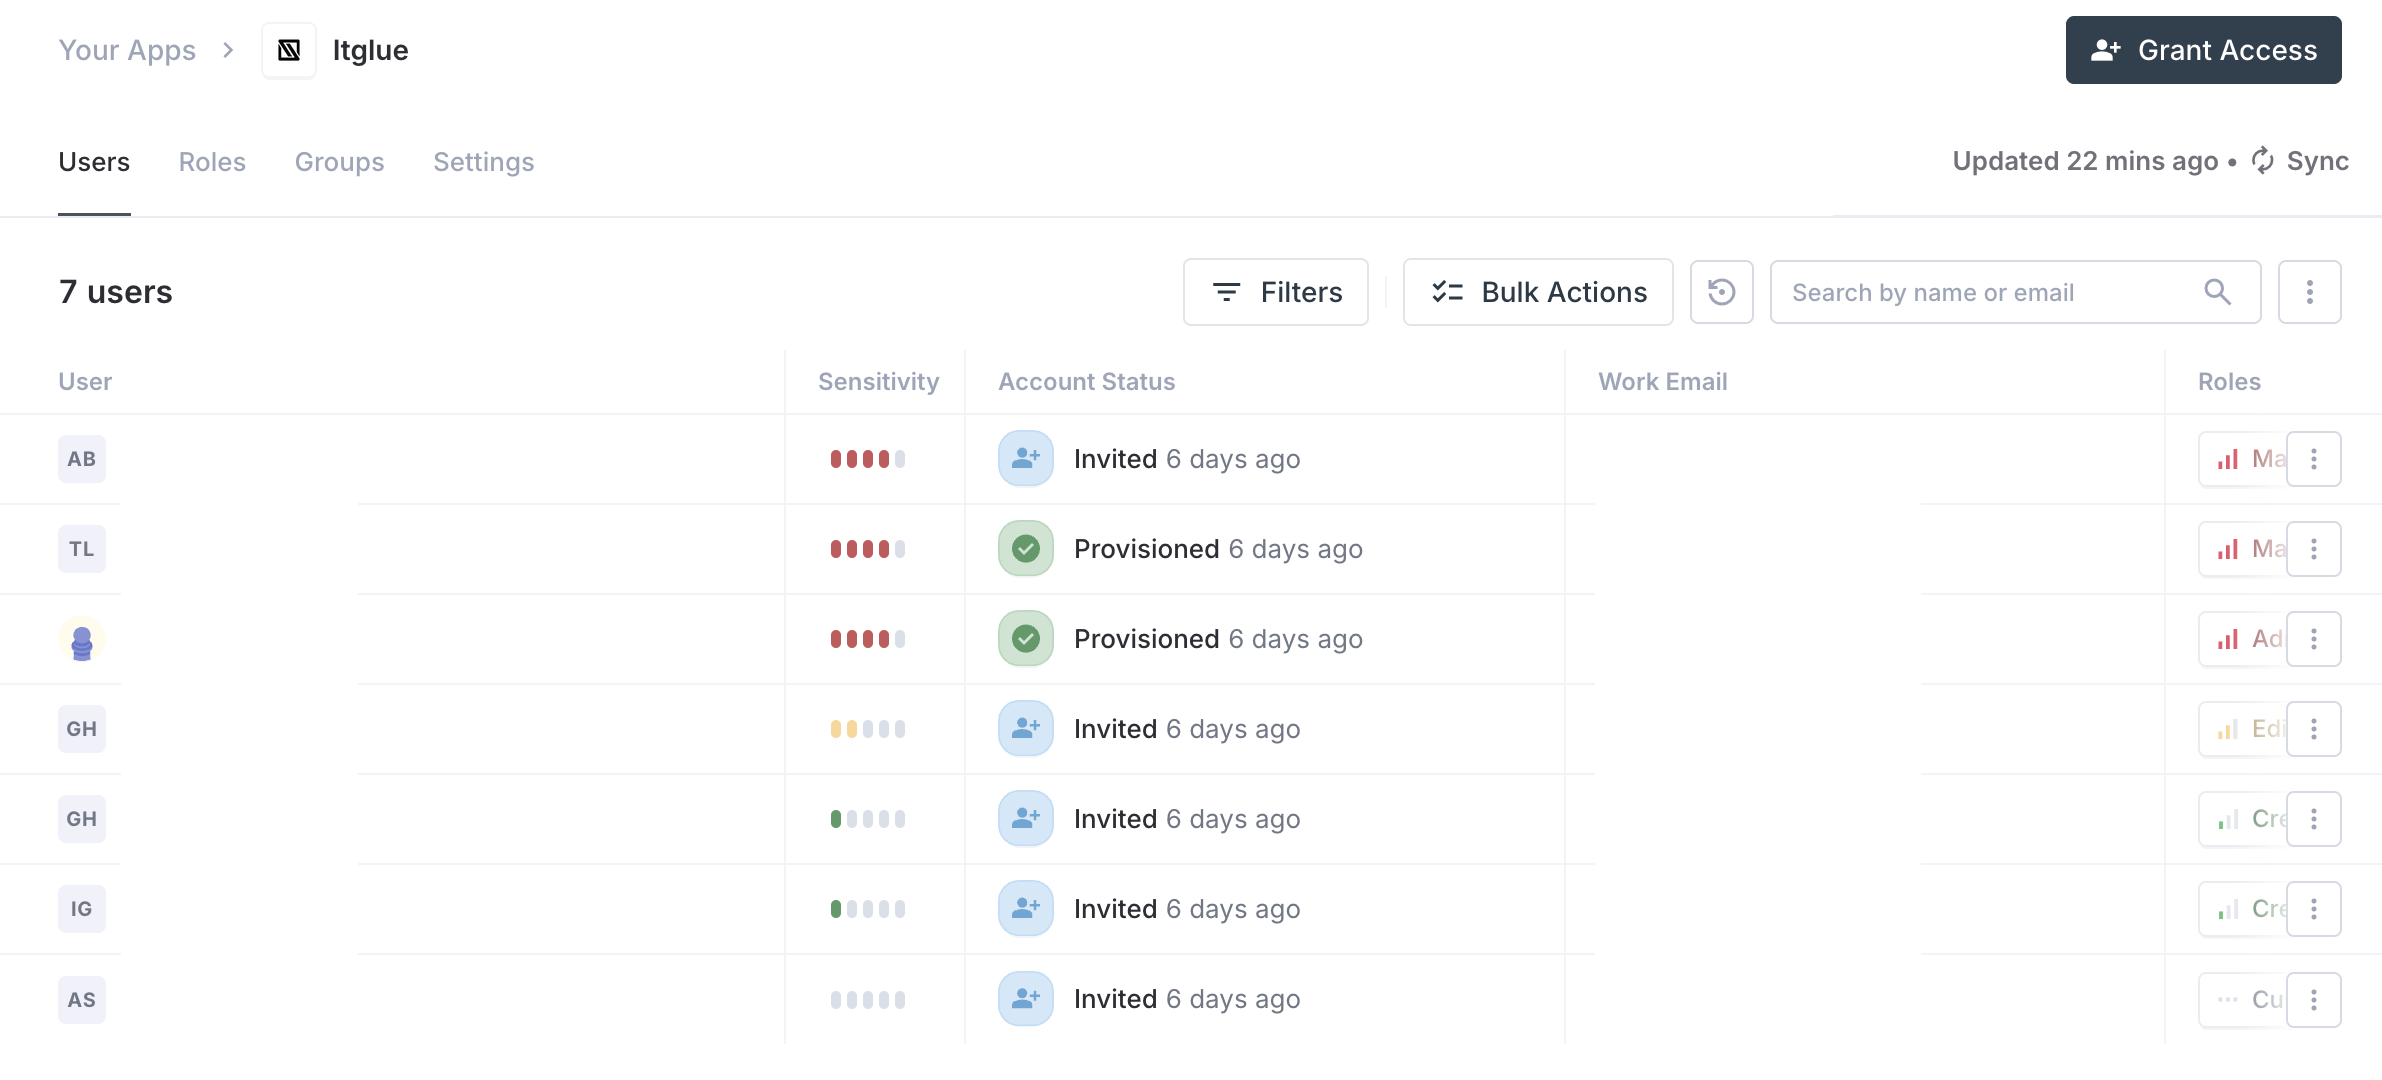
From the app's detail page: Go to Connected Apps, click on the app, and click the Grant Access button in the header.
From the user's profile: Go to Users, click on a user, and use the Grant Access option from their profile.
The screen below shows where to find the Grant Access button on an app's detail page:
Step-by-step
Step 1: Select the user
If you opened Grant Access from an app, you will first choose which user to give access to. Search by name or email and select them.
Users who already have active access to the app will not appear in the list. To change the access of someone who already has it, use the ticket flow instead.
Step 2: Select the app
If you opened Grant Access from a user's profile, select which app you want to give them access to from the app grid.
Step 3: Configure permissions
Choose the groups, roles, or permissions the user should have in this app. Search and select what is needed.
Example: For GitHub, select the
engineering-orgteam. For Salesforce, select theSales Repprofile.
Step 4: Select licenses (if applicable)
Some apps use license-based access, meaning each user occupies a paid seat in a specific tier. If the app works this way, choose the appropriate license or tier for this user.
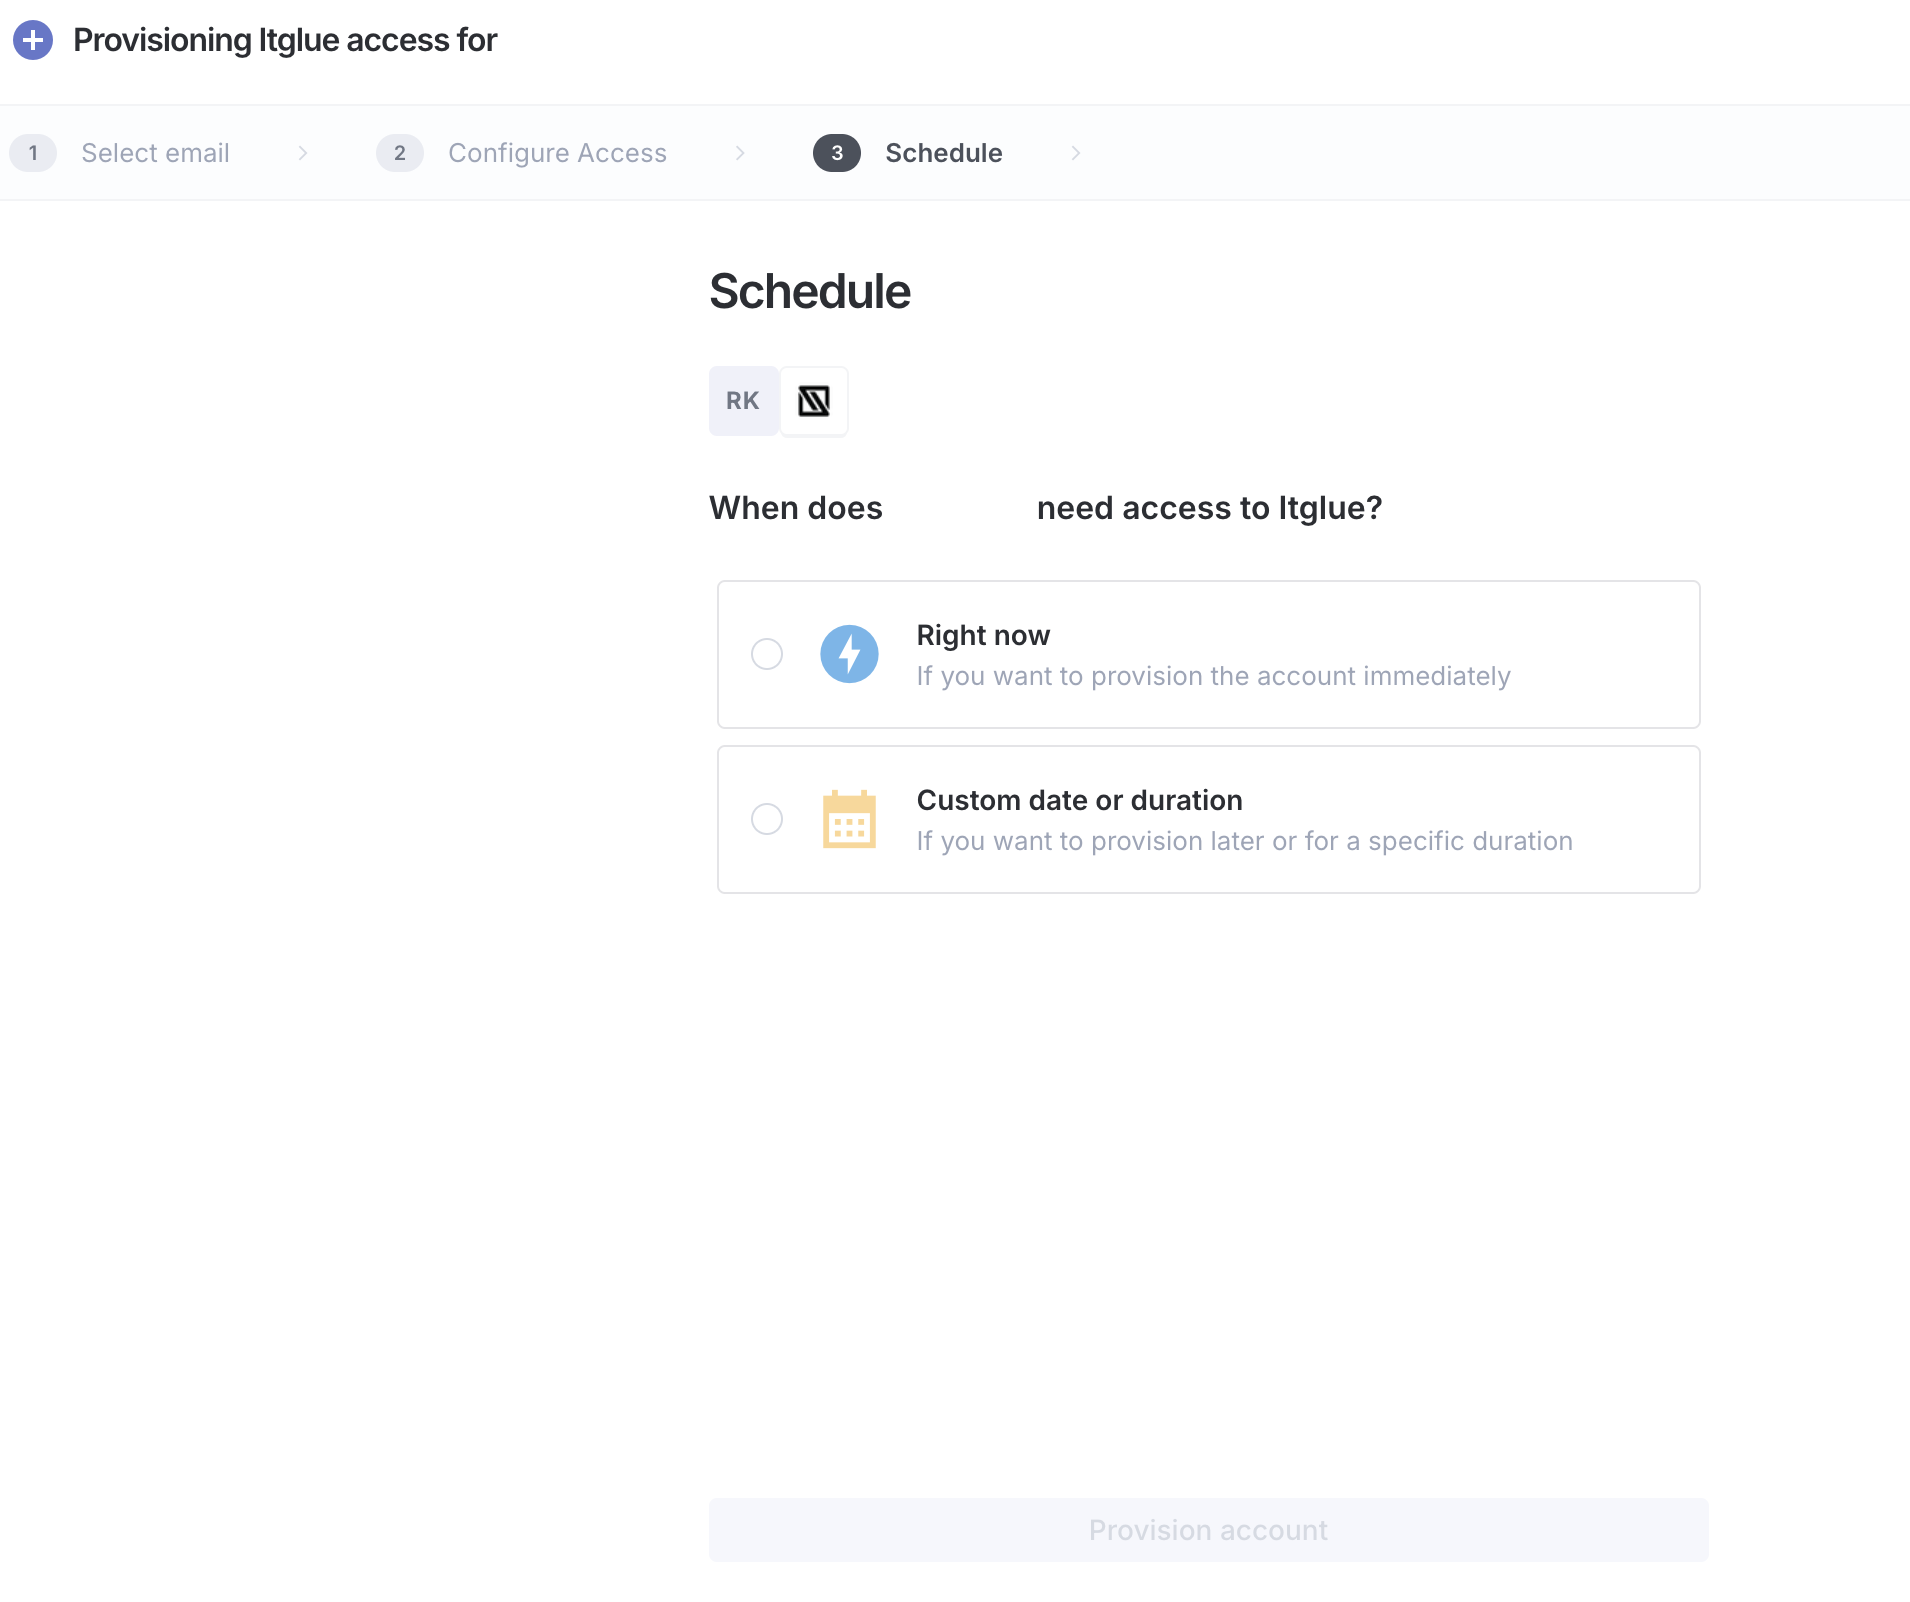
Step 5: Schedule the access
Set when the access should be active:
| Option | When access is granted |
|---|---|
| Right now | Immediately when you confirm |
| Custom date or duration | Choose a specific start date, and optionally an end date |
If you set an end date, Iden will automatically remove the user's access when that date arrives.
Click Provision account to confirm.
The screen below shows the full provisioning form:
Grant access vs. raising a ticket
Not sure which approach to use? This table compares the two options:
| Grant Access (admin) | Access Request Ticket | |
|---|---|---|
| Who can do it | Admins only | Any user |
| Approval required | No - access is granted immediately | Yes - goes through the approval process |
| Audit trail | Yes - recorded as a direct grant | Yes - full approval history |
| Best for | Onboarding, urgent access, admin-initiated setup | Self-service requests, standard day-to-day access |
Direct grants skip the approval process entirely. Use this only for deliberate, admin-initiated situations. For everyday access requests, encourage users to raise tickets so there is a proper approval record.